Site logo.
Previous
Next


CAD-model and rendering created by Ebba Lindberg.

The Bright Side

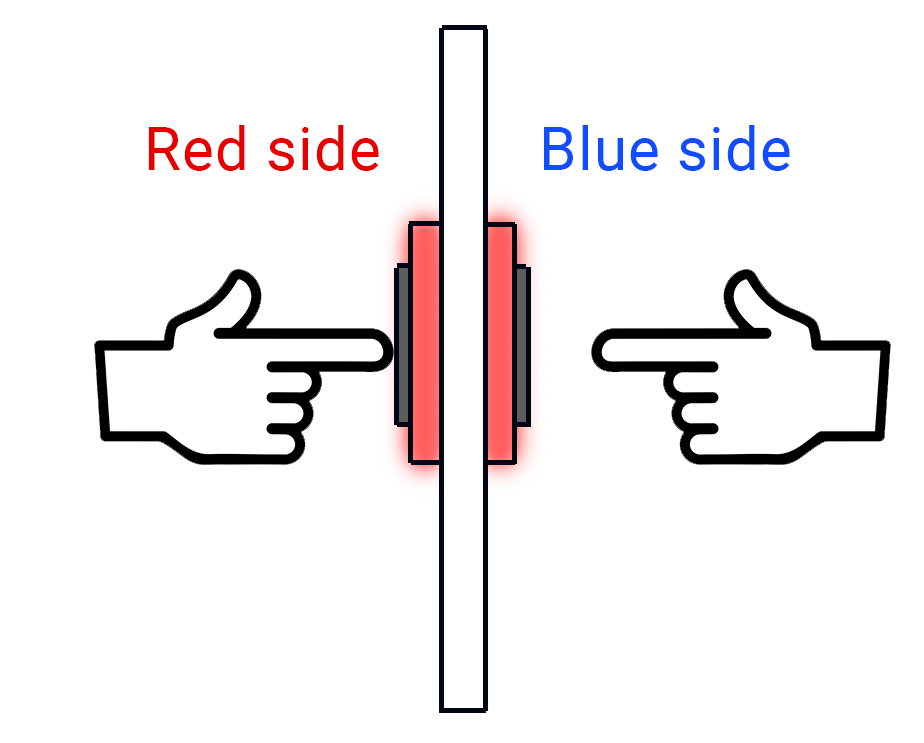
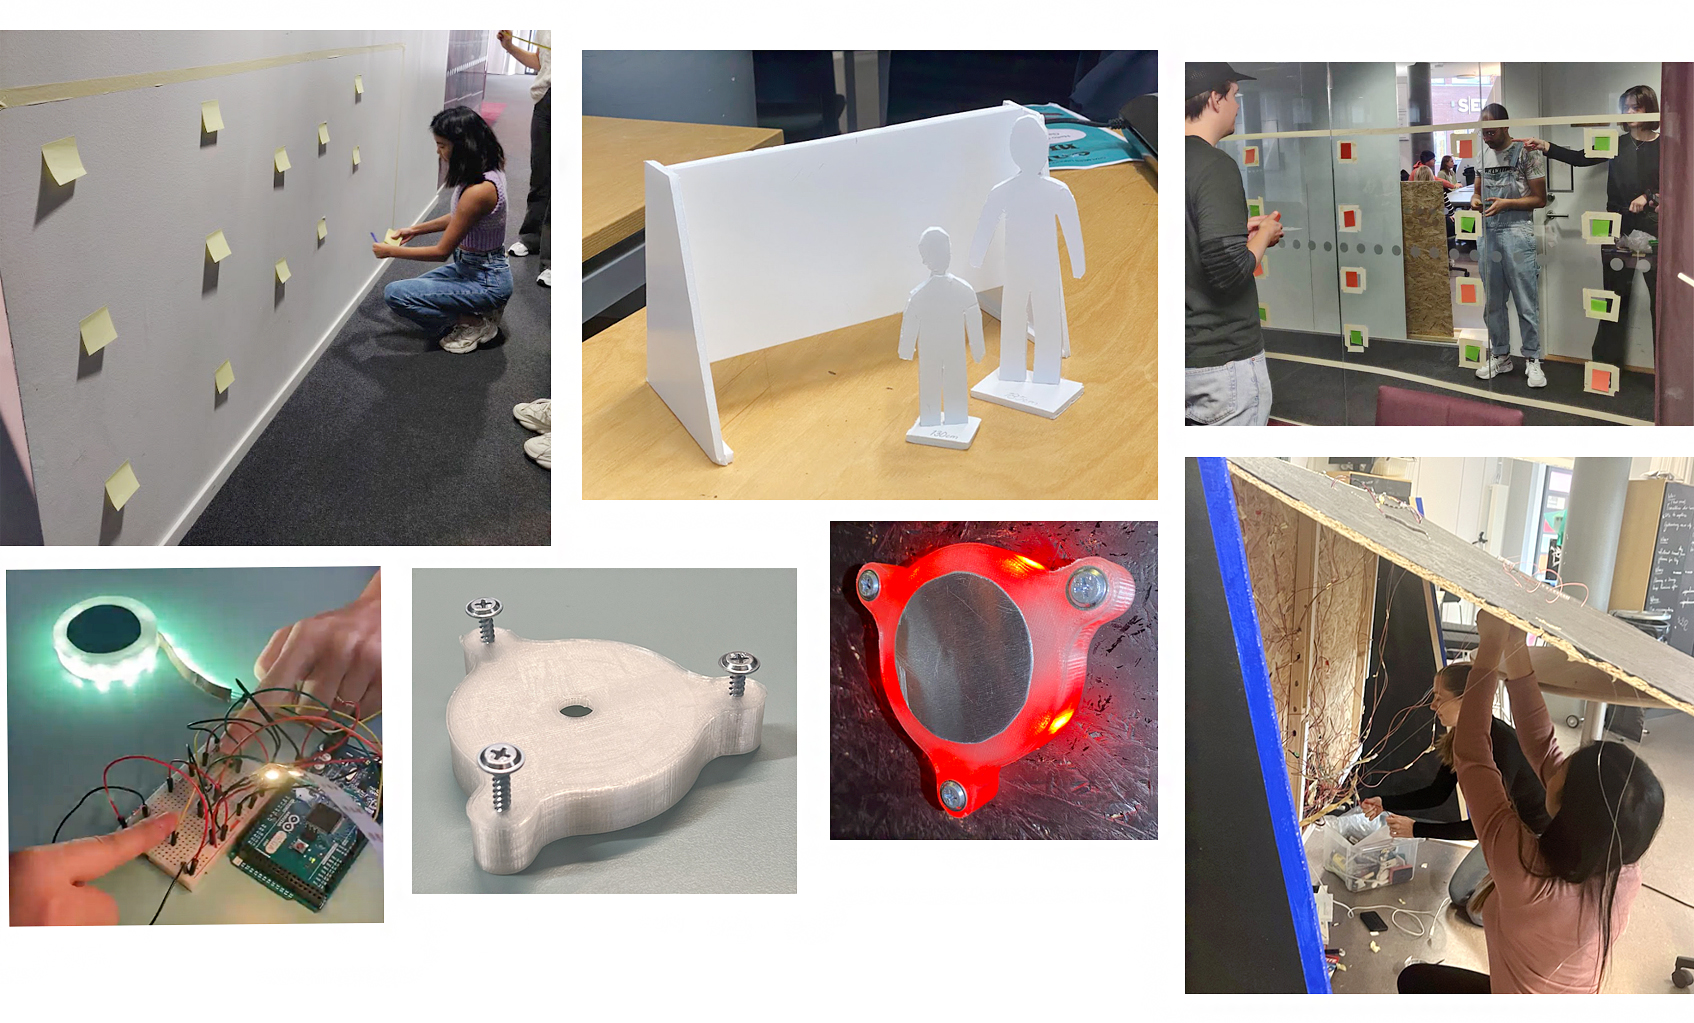
A two-player game designed to promote movement for kids and childish adults. The project was part of the course “Interaction Design Project” and was done in collaboration with the organization Generation Pep. According to them, only two out of ten kids meet the daily recommendation of physical activity.


To change this trend and promote movement in children, this game has been developed where bodily movement is the center of the interaction to involve kids in movement and teach them that physical activity can be simple and enjoyable. The goal is to claim as many buttons as possible, and the player who has the most buttons when time is up wins. The project was exhibited at Visual Arena and became a huge success!


A website was created for the exhibition and can be found >>Here<<.

Cred to Robin Sohlberg for setting up the website.

Type of project
Course project

When

September 2022 – October 2022

Teammates

Ebba Lindberg, Klara Rehbinder, Linda Silberberg, Robin Sohlberg, Panpan Zhang

My contribution

Programming, electronics, audio, assembling, video

Tools & techniques

Arduino IDE, capacitive touch sensors, Autodesk Fusion

Video

Here is a video showing how The Bright Side works.

Rules and gameplay

It is a two-player game where the goal is to claim as many buttons as possible. There are 12 buttons that can be claimed. The person standing on the red side should tap all the blue buttons to make them red, while the person on the blue side taps all the red buttons to make them blue. During the game players will hear a sped up version of the song “Mr. Brightside” by The Killers to promote movement. 

  • Players stand on either side of the wall, the red or the blue side.
  • The game starts when someone taps the start button on the side. A voice will count down , saying “Ready, set, go!”. At “Go!” the buttons will light up randomly, in either red or blue but there are equal amount of each color.
  • The player having the most buttons in their colour after time is up (50s) wins.
  • If a player manages to claim all the buttons to their color at the same time, it is an instant win.
  • A voice will begin counting down when there are 5 seconds left. When time is up the voice will communicate which side has won or if it is a tie.
Animation showing how a button pair works. There is a button on each side of the wall. When its pressed from the red side, it turns red, when its pressed from the blue side, it turns blue.

Design process

After coming up with the concept we started with lo-fi prototyping where we put masking tape and sticky notes on the wall to try out different sizes, amounts of buttons, and arrangements of buttons. A mini-sized version of the final prototype was made of foam board. Red and blue color were chosen to represent the two sides since they are easy to distinguish for people with colour vision deficiency, and is also an iconic color combination for representing two opposing teams in politics, sports and video games.


An early version with a glass wall and sticky notes that represented the buttons were used to test the game mechanics. In parallel we started writing the code to make it work for one buttonpair. We decided to create our own buttons with capacitive touch sensors. There were already existing arcade push buttons that you could buy, but they were too small and expensive. Touch buttons also do not have as many mechanical parts as a push button and therefore less prone to breaking. We knew that we had to build the wall as durable as possible since the gameplay was going to be hectic. With capacitive touch sensors, only a light touch is required for interaction.


The final buttons consists of a transparent, 3D printed PETG shell housing a LED-strip with an aluminum plate connected to a capacitive touch sensor (Adafruit MPR121). In total there are 24 LED buttons, 12 on each side. The wall consists of two OSB-boards hiding the complete mess of electronics in the middle. The chosen microcontroller is Arduino Mega because of its many pins. A DFPlayer Mini with a speaker on every side of the wall is used to play audio files.

Collage of work in progress of The Bright Side.

Reflection and insights

Wow, what a journey this was! This project was done by a group consisting of non-programmers only. When we formed the group we called ourself “No programmimg group” and said to ourselves we should stick to something simple, that we know that we are capable of doing. But then Robin came up with the brilliant idea of having a wall game with buttons and it was too good to not realize. So we renamed our group name to “No programming group goes programming”. We rethinked and saw the project as an opportunity to try out new things, learn new skills and go outside of our comfort zone. However, it was far from easy.


We struggled a lot with electronics since we did everything for the first time. We ran into issues we did not even know existed. The size of the wall and the amount of buttons added a lot of complexity. It was difficult to find a proper place to build the wall. It was heavy and difficult to carry, and it had to be unscrewed to go through the doorway. We also had power issues due to the amount of buttons. If we only knew beforehand that the project would result in over 100 metres of wire, 200 solder joints, and 1000 pieces of five different tapes (masking, electrical, copper, aluminum and double-sided)…


Tears fell during the project and sometimes we were not sure if we could make it. When everything worked out in the end it was such an unbelievable relief! I have never been this emotionally invested in a project ever. After this project I gained tons of confidence when it comes to programming for Arduino. It was an amazing feeling being able to add a layer of electronics into the prototype to make it truly interactive. It is just so much cooler compared to Wizard of Oz. But if I would redo the project I would probably do it in a smaller scale to calm my nerves.